


According to my initial plan, I was supposed to start sharing recipes last Sunday. I had a recipe ready to go, I tested it, shot it, filmed it, I was so close to publishing it, but something about it didn’t feel special enough for it to be my debut newsletter recipe, so I decided to postpone it.
I’ve been meaning to develop a rich, juicy, chocolate cake for the longest time, not sure why it took me this long to do it, but here we are today! A no fuss chocolate cake seemed like a proper recipe to start this newsletter with.
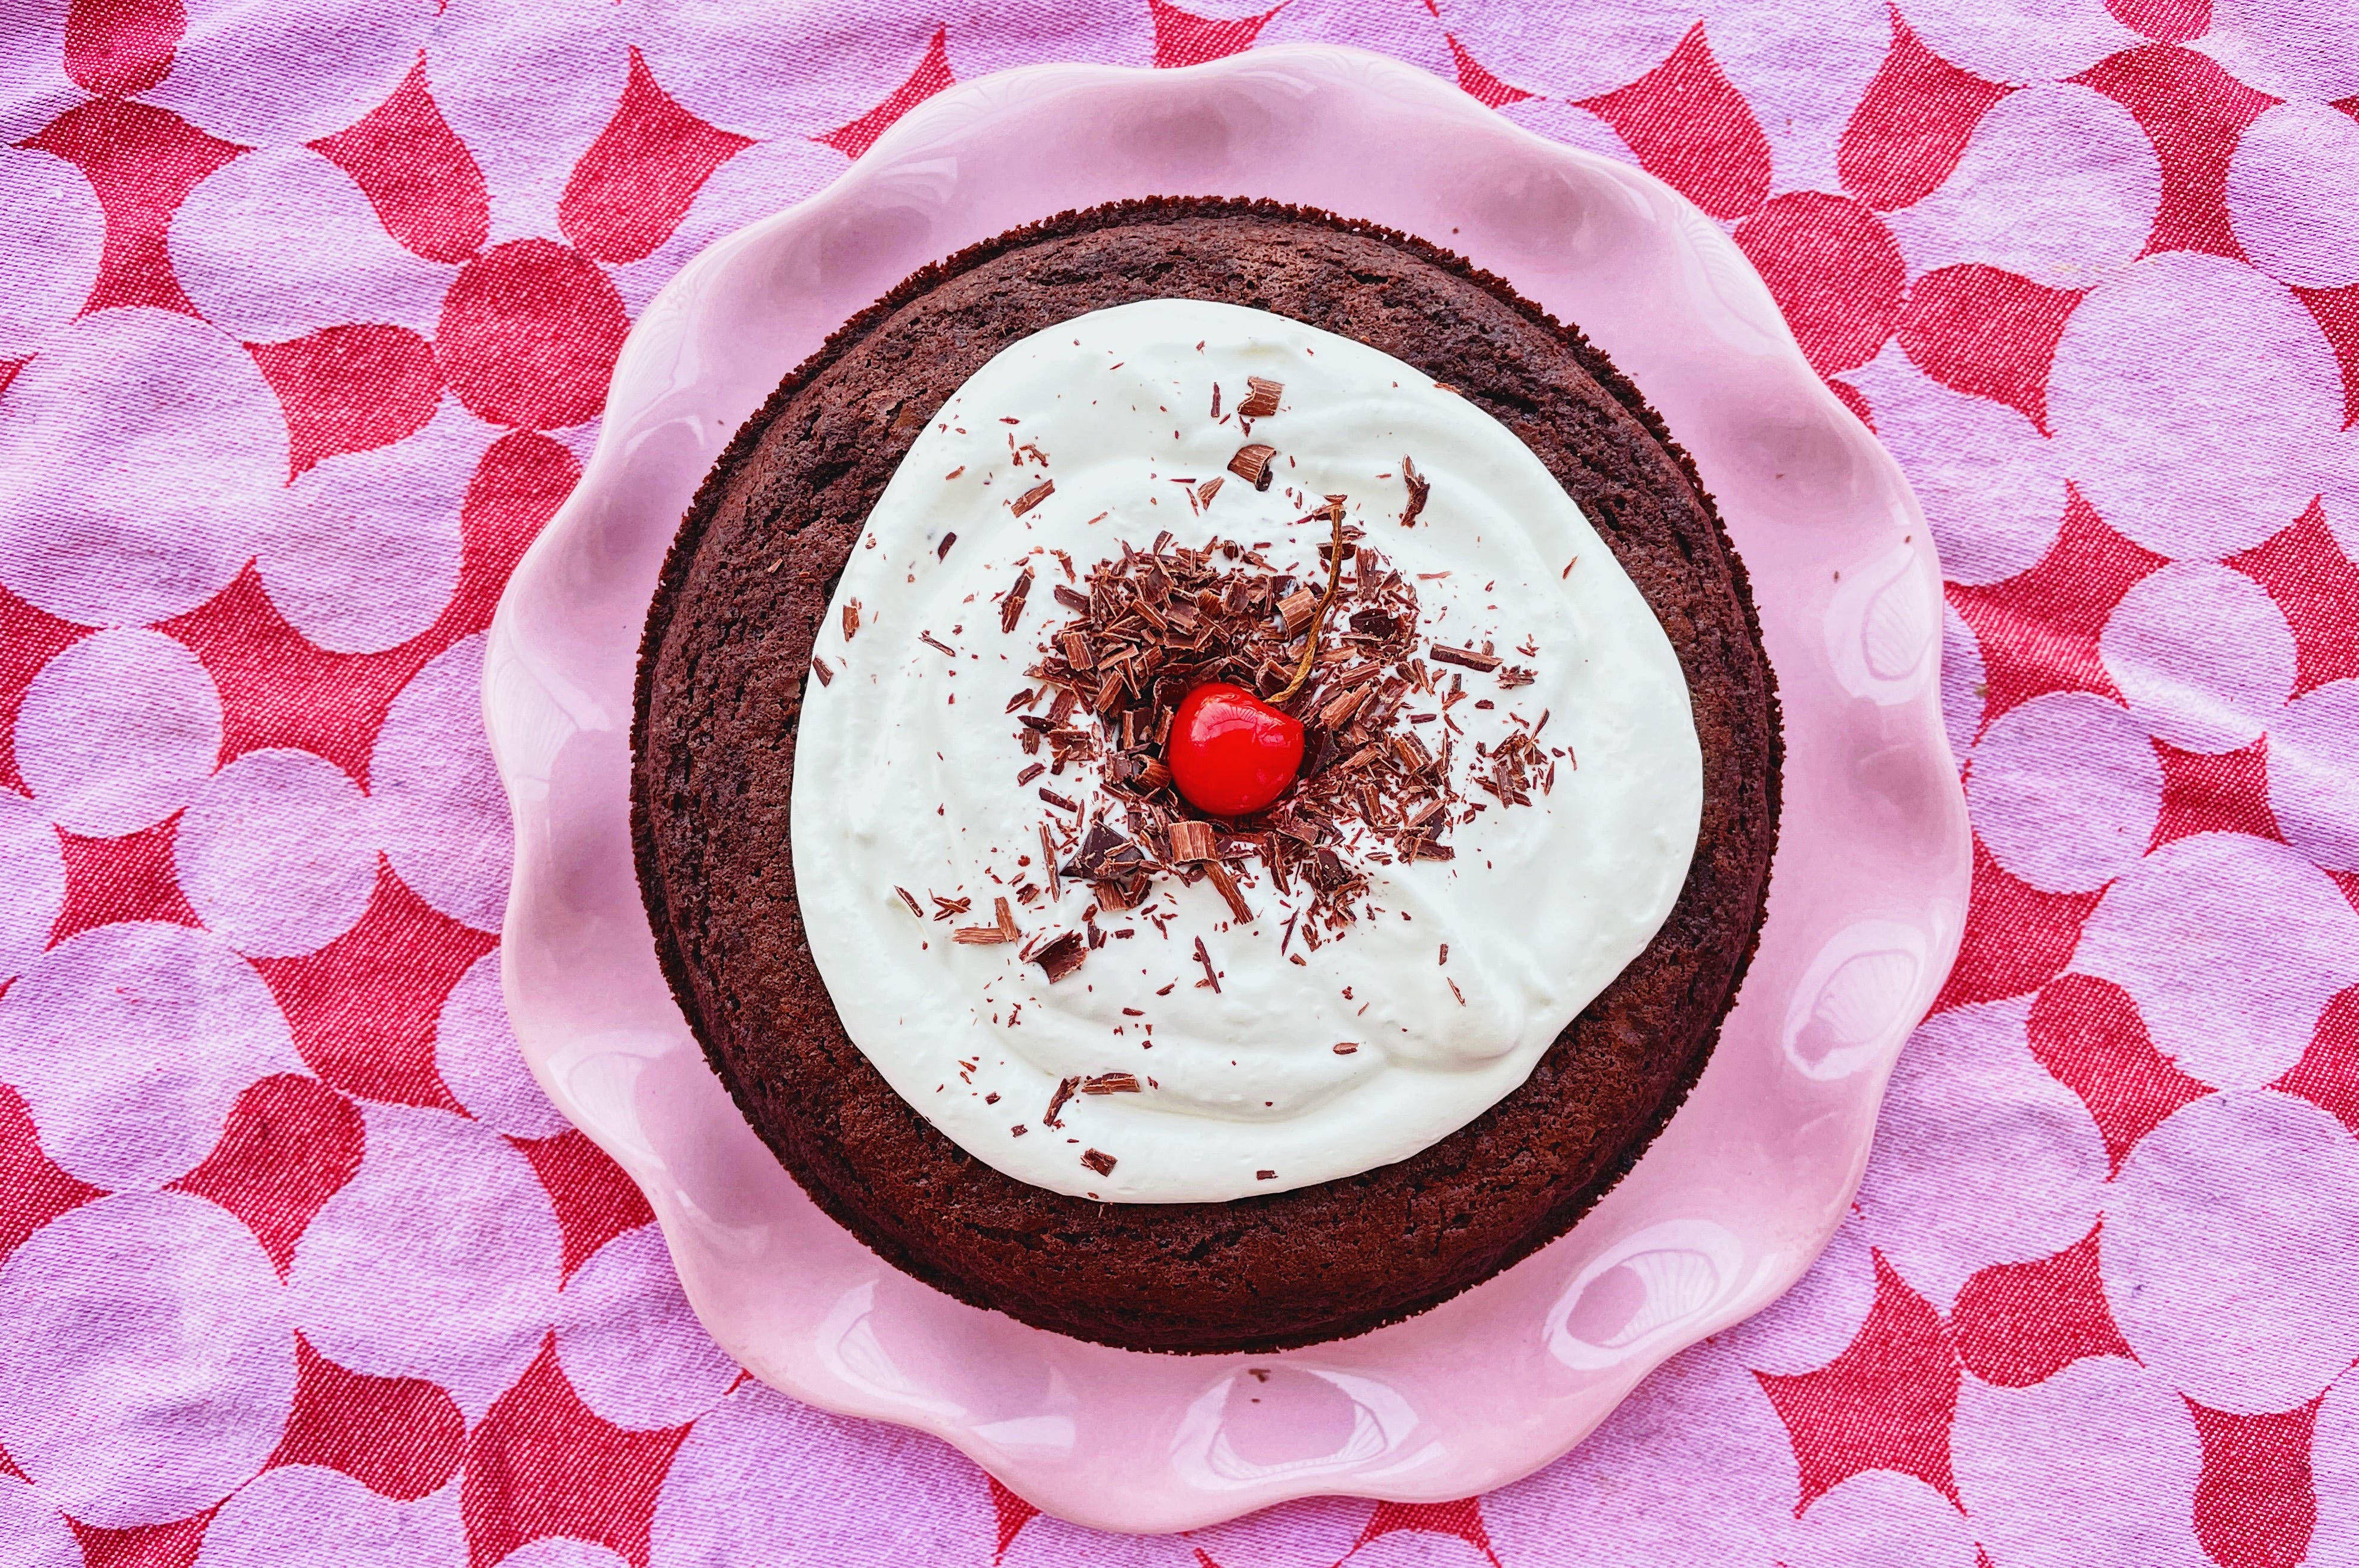
You’re signing up for a recipe in which everything happens in one bowl, you’ll need a whisk and a spatula, and that’s it for the utensils. I topped the cake with whipped cream in the photo attached to this post, but I must admit, I did it solely for aesthetic purposes. It honestly doesn’t need the cream, you can finish it off with a dusting of cocoa powder or powdered sugar. If you want to go above and beyond, throw a scoop of ice cream next to it, it’s a pretty great combo.
This is the type of dessert that can be a birthday cake if throw some frosting on top, something you bake in a rush for unexpected guests coming over, or a cake you bake on a Monday and have it for breakfast throughout the week.
RECIPE
Servings: 6
Prep Time: 10 minutes
Cook Time: 30 to 35 minutes
INGREDIENTS
2 eggs
1 1/4 cups (250 g) sugar
1/2 cup (100 g) extra-virgin olive oil
1/3 cup (32 g) Dutch-processed cocoa powder, sifted
1 tablespoon instant coffee
1/2 teaspoon kosher salt
1/2 cup (105 g) heavy cream
1/2 teaspoon baking soda
1 teaspoon any vinegar
1 1/8 cup (150 g) all purpose flour
1/2 teaspoon baking powder
SUBSTITUTIONS FOR:
eggs: flax eggs or 50 to 60 g aquafaba
extra-virgin olive oil: any neutral oil of choice, like avocado oil or grape seed oil
Dutch-processed cocoa powder: regular cocoa powder
instant coffee: don’t go all the way to buy a new pack if you won’t use it ever again, simply skip this one
heavy cream: canned full-fat coconut milk or any creamy non-dairy substitute
vinegar: lemon juice
INSTRUCTIONS
Heat the oven at 375°F or 190°C.
Grease an 8 inch or 20 cm round pan (or loaf tin, or square tin) with oil and line it with parchment paper.
Whisk the eggs, sugar, oil, cocoa powder, instant coffee, salt, heavy cream, baking soda, and vinegar in a large bowl.
Add the flour and baking powder to the bowl, and whisk until the batter looks smooth.
Pour the batter in the baking dish and bake for 30 to 35 minutes, or until the cake looks hardened on top and bouncy to the touch. The cake might have a slight dent in the middle. All of our ovens are different, so keep an eye on the cake, start checking the oven 20 to 25 minutes into baking.
Allow the cake to rest for 5 to 10 minutes, slice and serve. I like to serve the cake while hot and steamy.
Store the leftover cake at room temperature in a closed container, up to 4 to 5 days.
Behind the Scenes of Recipe Development
Since I received a few requests in the past to share the thought process and behind the scenes of developing a recipe from scratch, I figured this would be the ideal recipe for a case study. These are the main steps I like to follow whenever I whip up a new recipe:
1. Define your goals
This is probably the most important step when it comes to developing a recipe, defining what you want to create. My intentions were very clear with this chocolate cake, I wanted:
an easy, approachable, no fuss chocolate cake recipe;
everything to happen in one single bowl;
a visibly moist cake, one of those cakes you slice into and are like: “wow, that looks moist”;
no store-bought chocolate involved (melting chocolate is a whole extra step and mess I wanted to avoid).
2. Eyeballing phase
Now that we defined some rules for our recipe, it’s time to play around with measurements. Let me preface this by saying every recipe developer has a different technique when it comes to creating new recipes: some start from nothing and some start with an already existing recipe as a guide.
I’m an eyeballer when it comes to creating this stuff, a characteristic I’ve inherited from my mother. I have never seen that woman use a recipe in her life, even if she did, she wouldn’t follow the recipe and make up her own instructions along the way. Cooking at home was always an intuitive and dynamic experience guided by whatever ingredients we had in our kitchen. Growing up, my family had a very firm rule that no food gets wasted or thrown away in our household, therefore getting creative using scraps or leftovers in our meals was an ordinary occurrence. Okay, I’m digressing!
The eyeballing phase consists of throwing a bunch of ingredients in a bowl and hoping for the best. Because I have done this quite a few times before, I have a general idea of what ingredients are needed for a cake, what consistency a cake batter should have or at what temperature I should bake the cake. If you’re new to this and want to start developing recipes on your own, don’t hesitate reading other recipes that are similar to what you’re trying to create in order to get familiar with the concept and ingredients that go into it!
Working for Food52 got me used to developing recipes using cups as measurements. While cups are not the most reliable way of measuring ingredients (weighing the ingredients is), I prefer starting with cups, and eventually converting those into grams, for the sake of keeping the recipe as neat as possible. Let me explain: it’s much easier to start with 1 cup of flour and covert that into a number of grams, rather than trying to convert 143 grams of flour into 1 cup 2 tablespoons and 1/2 teaspoon of flour. See what I’m saying?
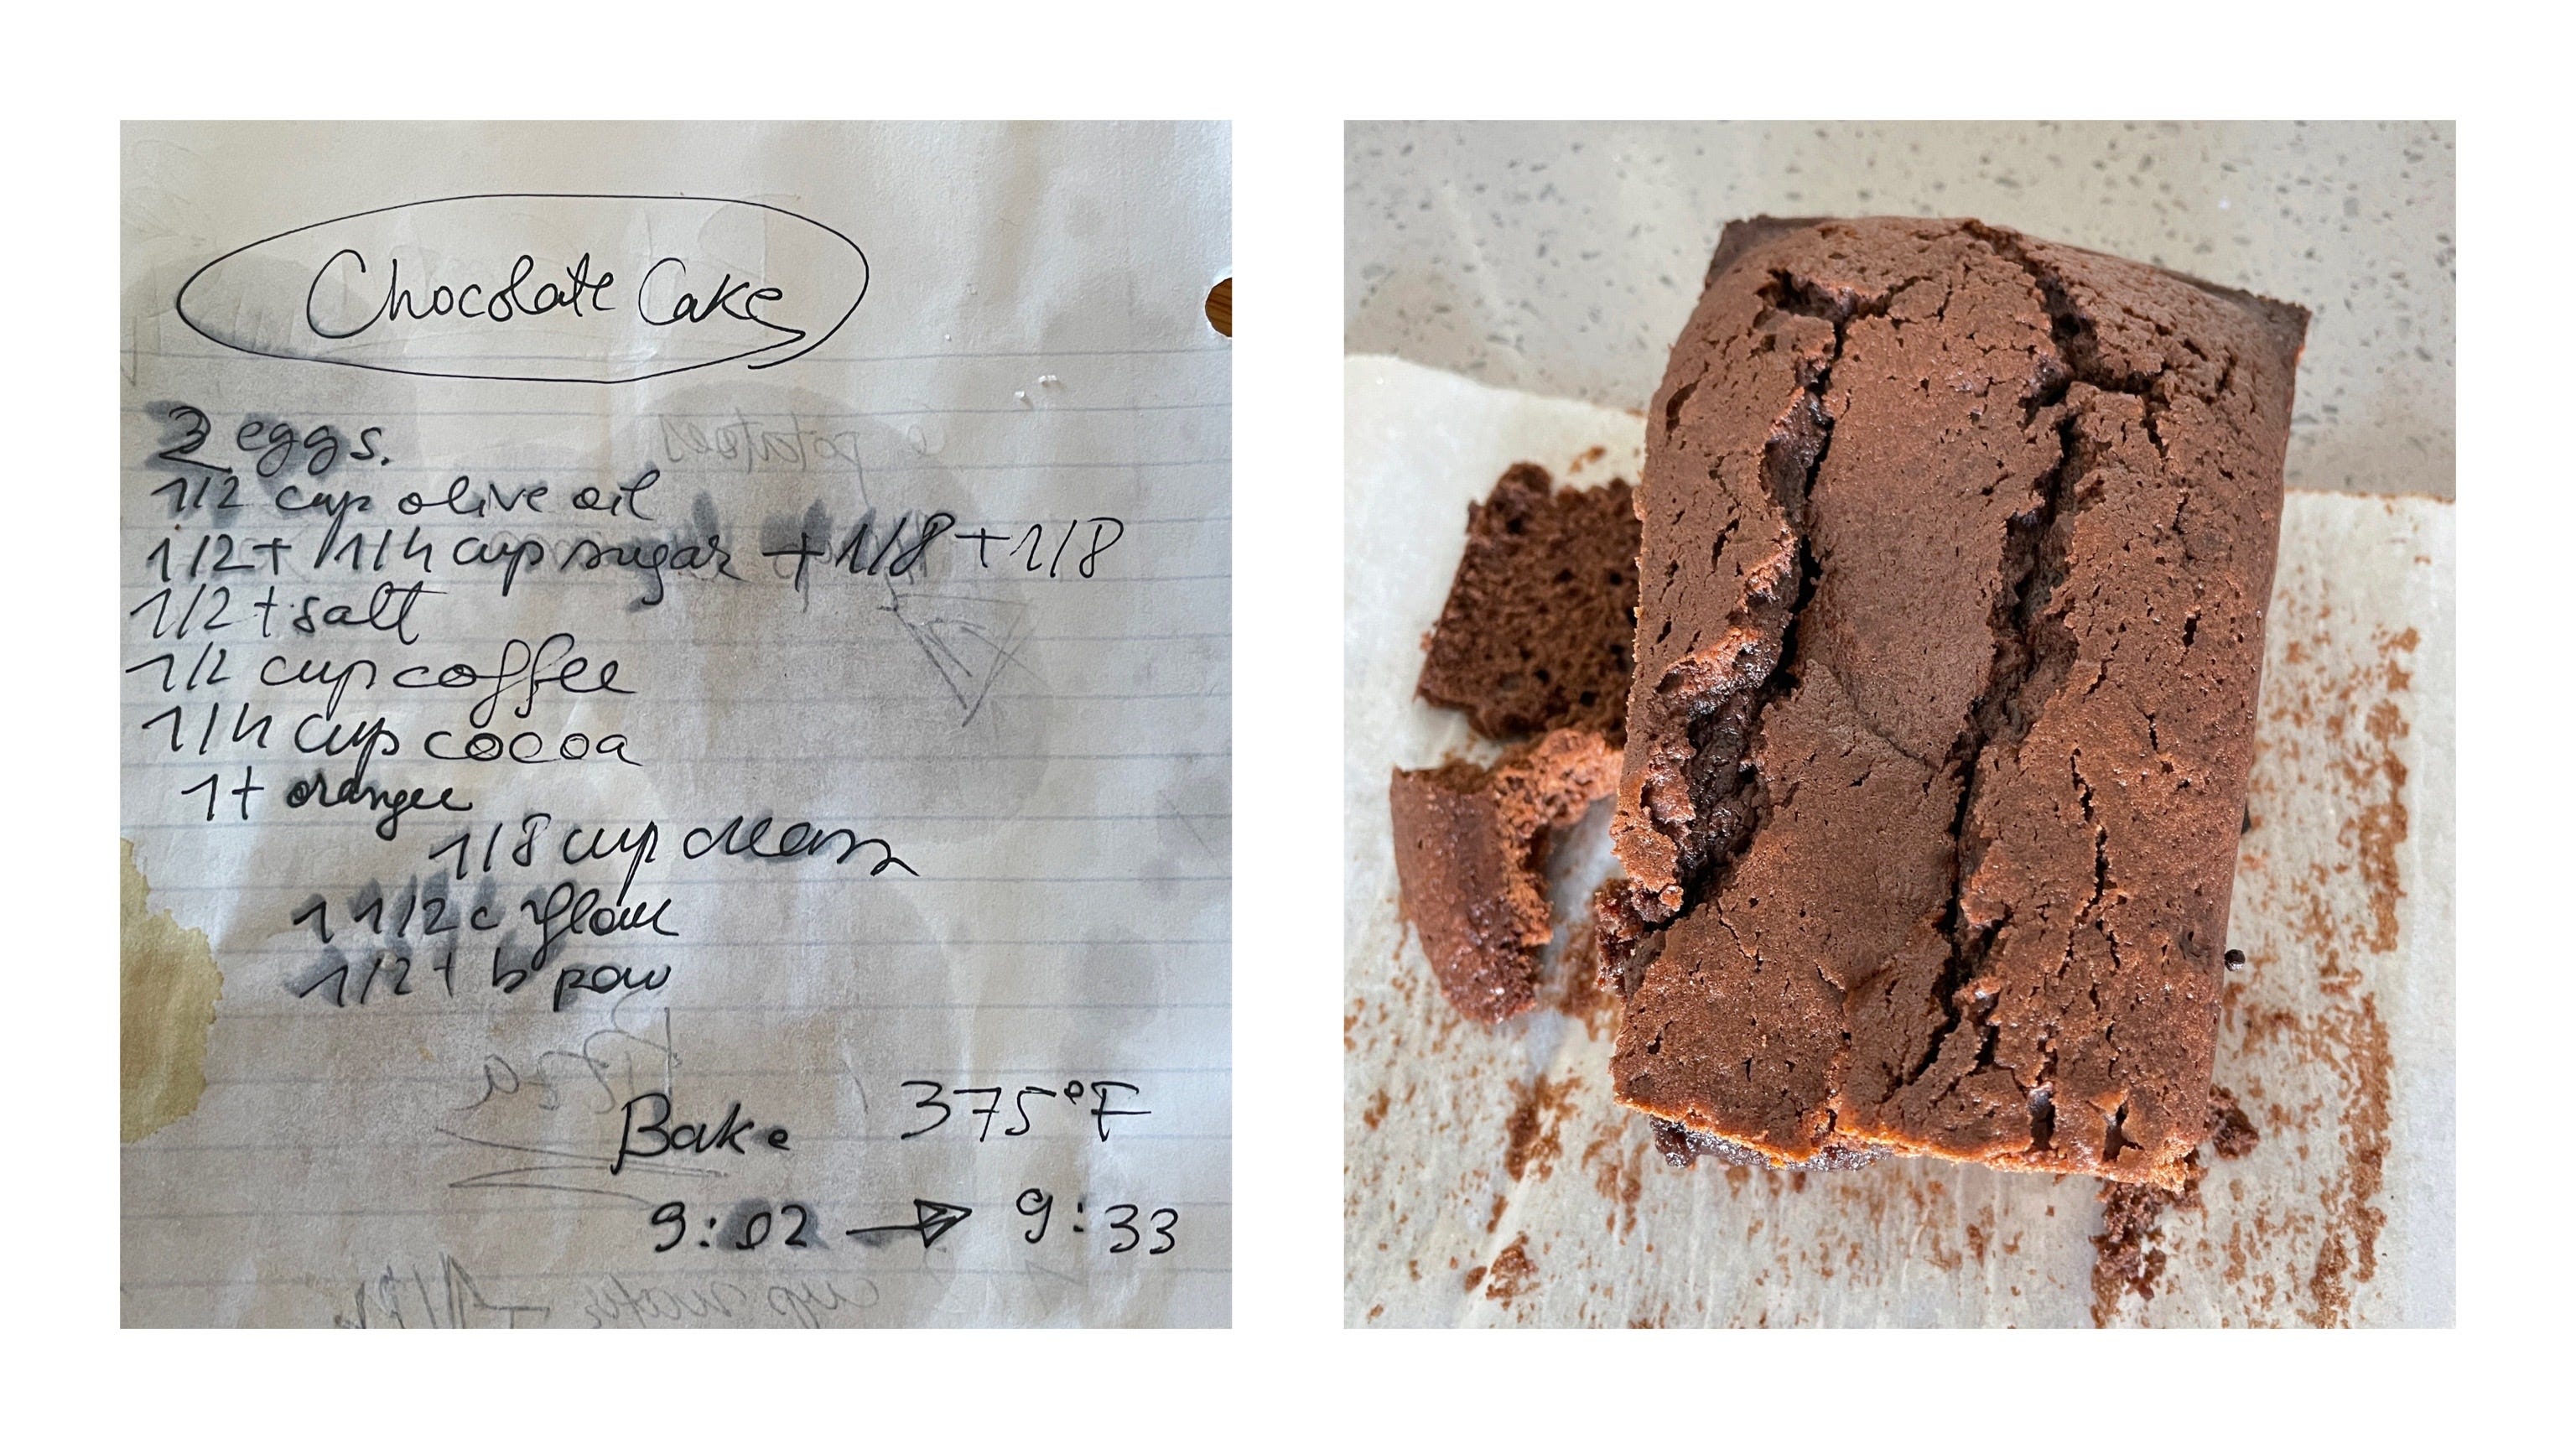
Back to eyeballing: when it comes to baking, I like to start with wet ingredients first, then mix in dry ingredients until I reach the desired batter consistency. For the first test, I went in with two eggs as a binder, cocoa powder, half a cup of coffee to deepen the chocolate flavor of the cake, sugar, extra-virgin olive oil for richness and fat, and a couple other things. Lastly I added enough flour to reach a decent cake batter consistency. I know you’re not supposed to do this and I’m not advising you to do so, but I always try the raw cake batter first to make sure it’s sweet enough. Maybe do this before you add any eggs! Baked the thing in a loaf tin and called it a day.
3. Taste, test, taste, test
Once the chocolate cake is ready, it’s time to taste, analyze, and figure out what went wrong (or right)! For this particular test I had the following complaints: the color of my cake was too light, the taste wasn’t chocolatey enough, the crumb was too dense and the cake was way too dry. All of that meaning:
the cake needs more cocoa powder;
there’s too much flour;
there’s not enough fat.
As you can see, it’s a very basic trial and error process. The next draft comes with solutions for the problems we’ve identified, therefore I:
added more cocoa powder for a deeper chocolatey flavor and darker color;
removed some of the flour;
removed the half cup of coffee and used instant coffee instead, this way I can keep the deep coffee flavor and use richer liquids that’ll add more moisture and fat to the cake;
added some extra heavy cream for a more tender, moist, soft crumb.
Baked the chocolate cake again, in a loaf tin, it was rising beautifully for the first 25 minutes, then it suddenly collapsed in the last 5. That tells me the cake was too heavy and rich and didn’t have enough structure for it to stay risen, so it simply collapsed, which means:
there’s not enough gluten (flour) in the cake.

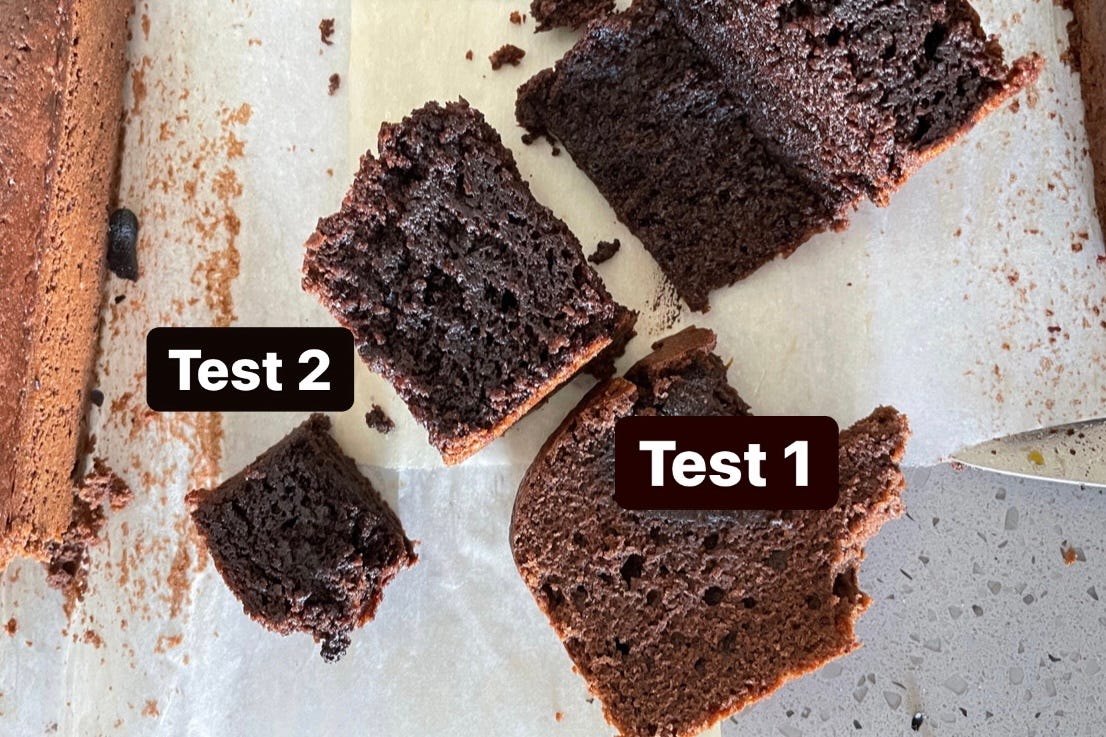
The good news was, the taste and texture were perfect, a rich, soft, borderline brownie type of cake, with a beautiful crumb and nice level of moisture. I inhaled three slices of hot cake as soon as it came out the oven. All there was left to do was add a tiny bit more flour to the next test, so it wouldn’t sink so deep and call it a day. I decided to move the cake from a loaf tin to a round one as well. I added 1/4 cup of extra flour to the next test, which felt a tad bit too much. I tested the cake again with 1/8 of extra flour instead of 1/4, that was the sweet spot.
And that, my friend, is how I develop a recipe! It’s a very rustic way to do it, but this is how I got used to doing it. I know what you’ll ask next:
What happens to all these failed tests?
I rarely end up with a test that isn’t edible. All this food gets frozen, turned into a leftover or gifted (if it’s delicious and pretty enough to be gifted). Cakes might end up dry, but they’re still very much edible and can be turned into something delicious: take the first test I’ve previously described. You can fry a slice of dry cake in butter, add some jam on top and you've got yourself a delicious sweet breakfast. Bread pudding, hello?! Also cake pops, turns out dry cake makes a tasty cake pop. It’s almost a fun creative challenge figuring out ways to use all these scraps!
I’m sure you’ve figured this by now, baked goods take quite a few tests to develop due to all the factors influencing their texture, taste, structure, meanwhile cooked or raw dishes can take as little as two tests. There’s not that much to test in a salad, or a steamed broccoli, you know?!


Share this post